Google Calendar Form Sync
The complete guide to seamless booking integration.
01 Introduction
Google Calendar Form Sync is a premium management tool designed for professionals. It allows you to synchronize your WordPress website with Google Calendar directly, ensuring that availability is always accurate and double bookings are impossible.
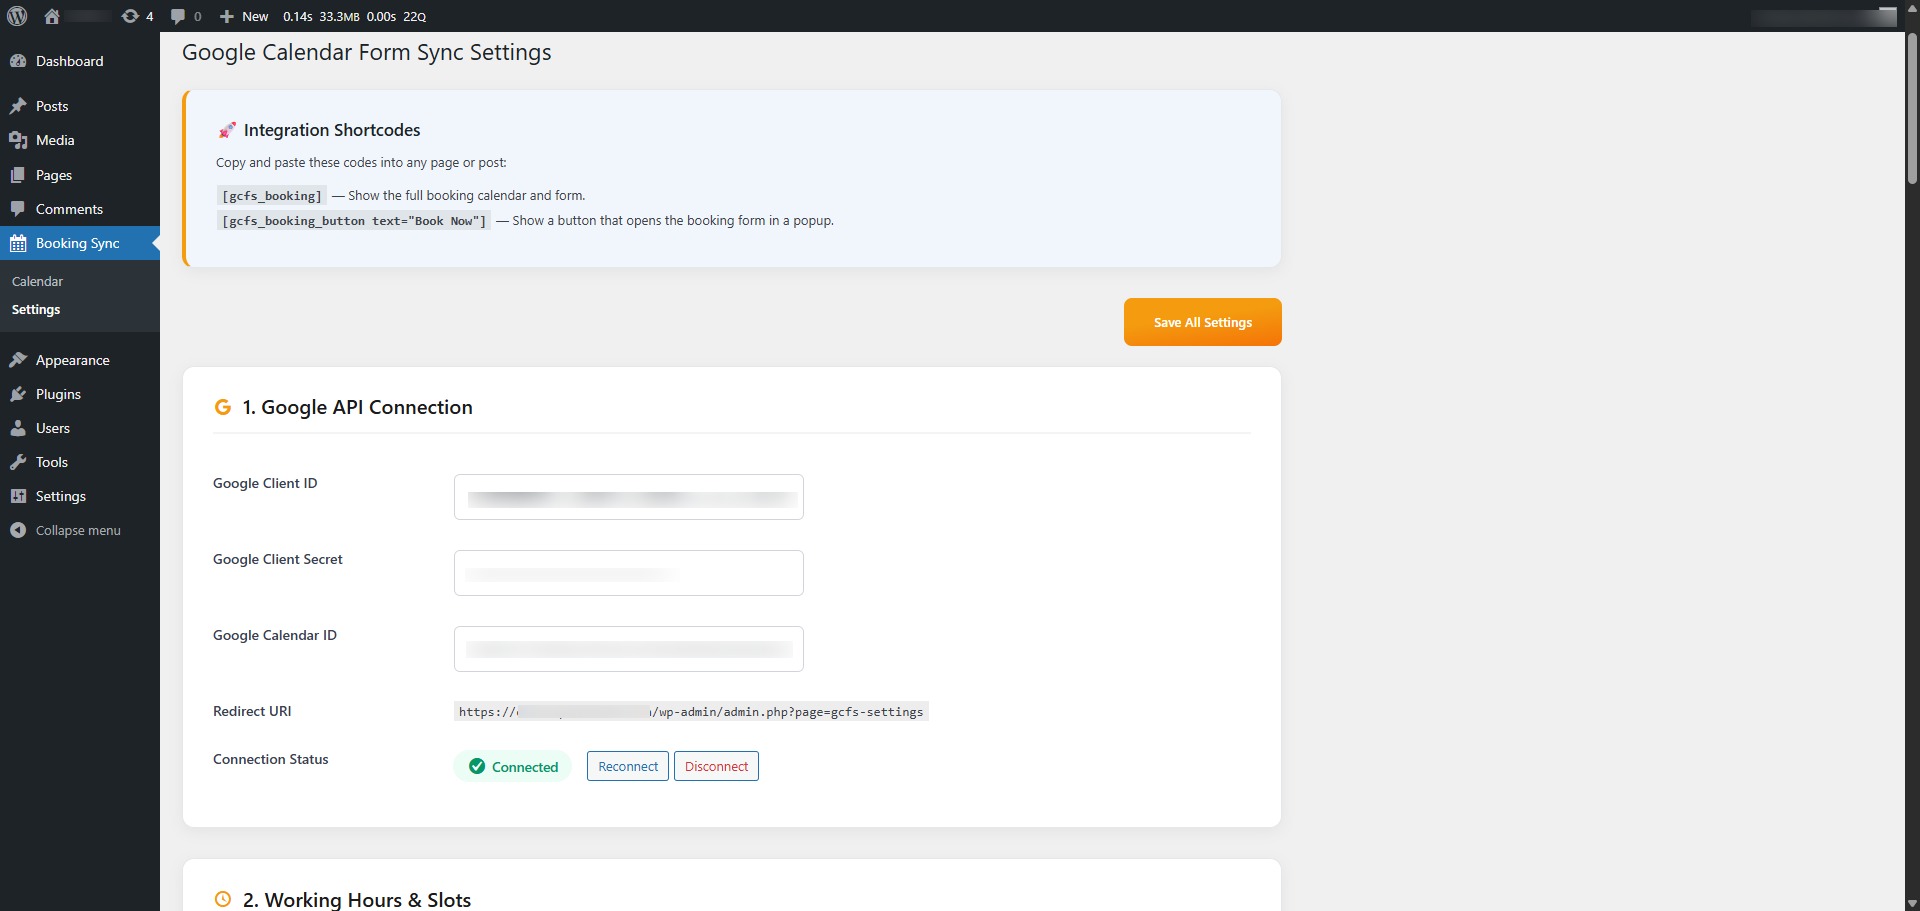
Admin Settings Interface - Connected State
02 Google API Integration
To connect your website to Google Calendar, you need to create a project in the Google Cloud Console. Follow these 17 precise steps to ensure a perfect connection.
Phase 1: Project & API Setup
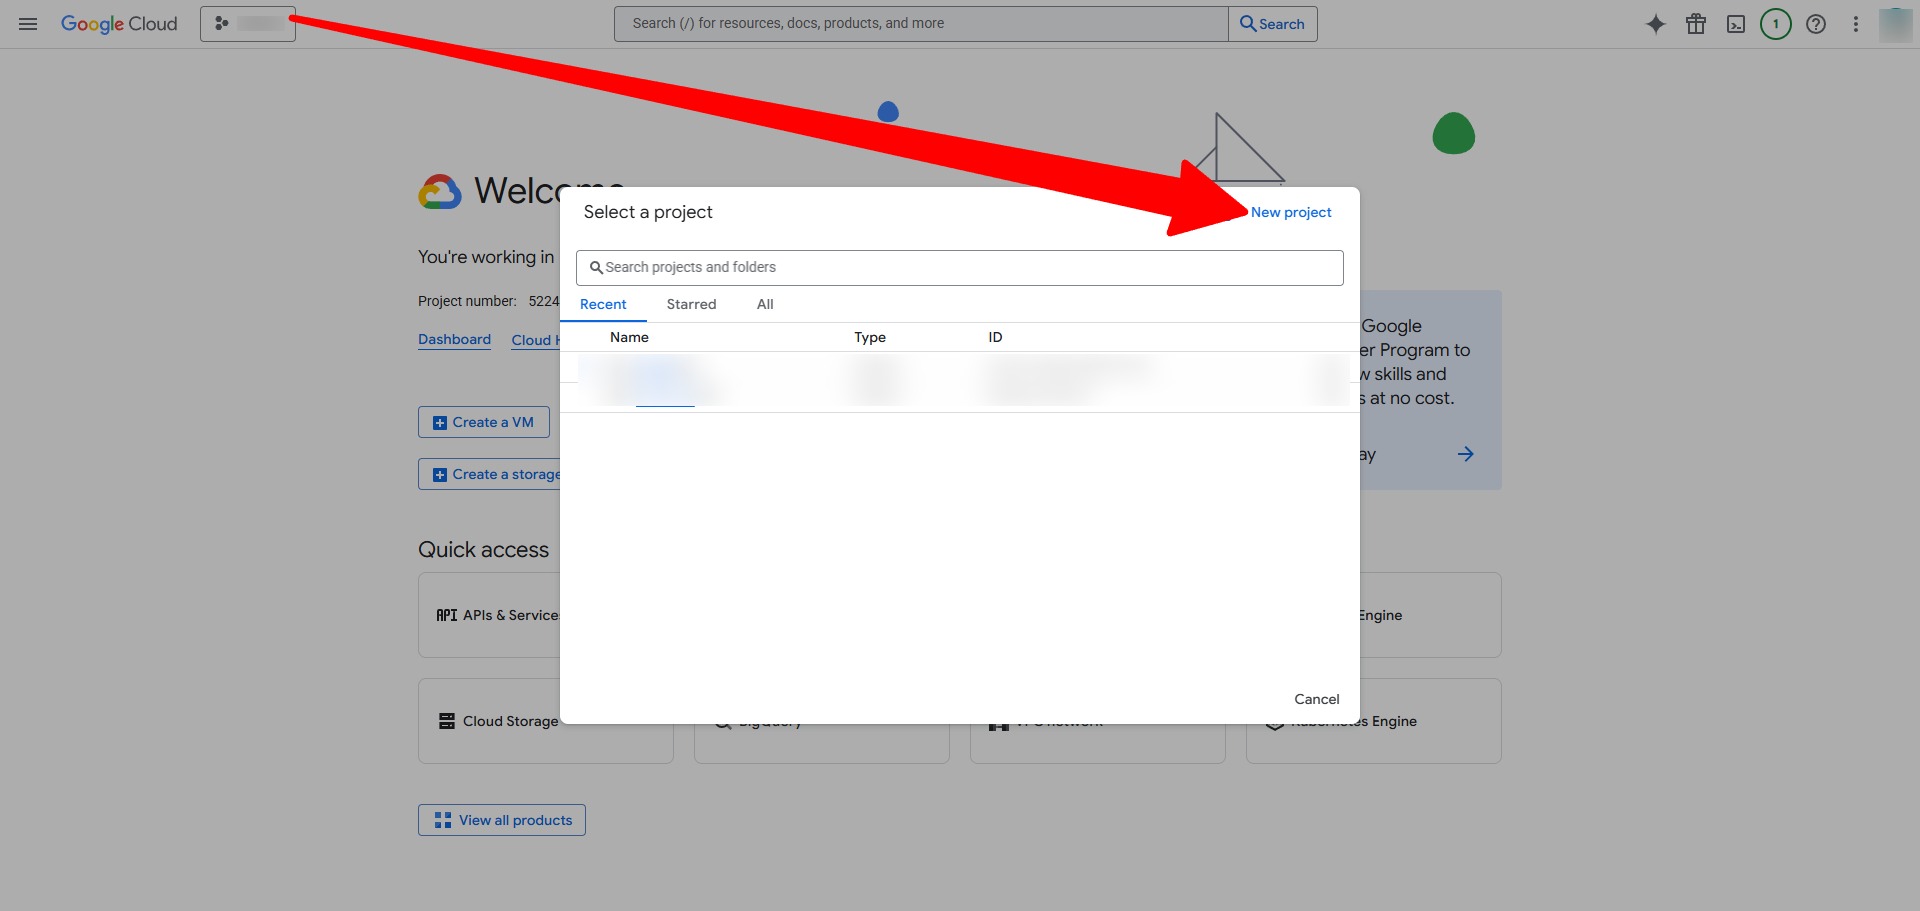
Create a New Project
Visit Google Cloud Console. Click the project selector and select "New Project".
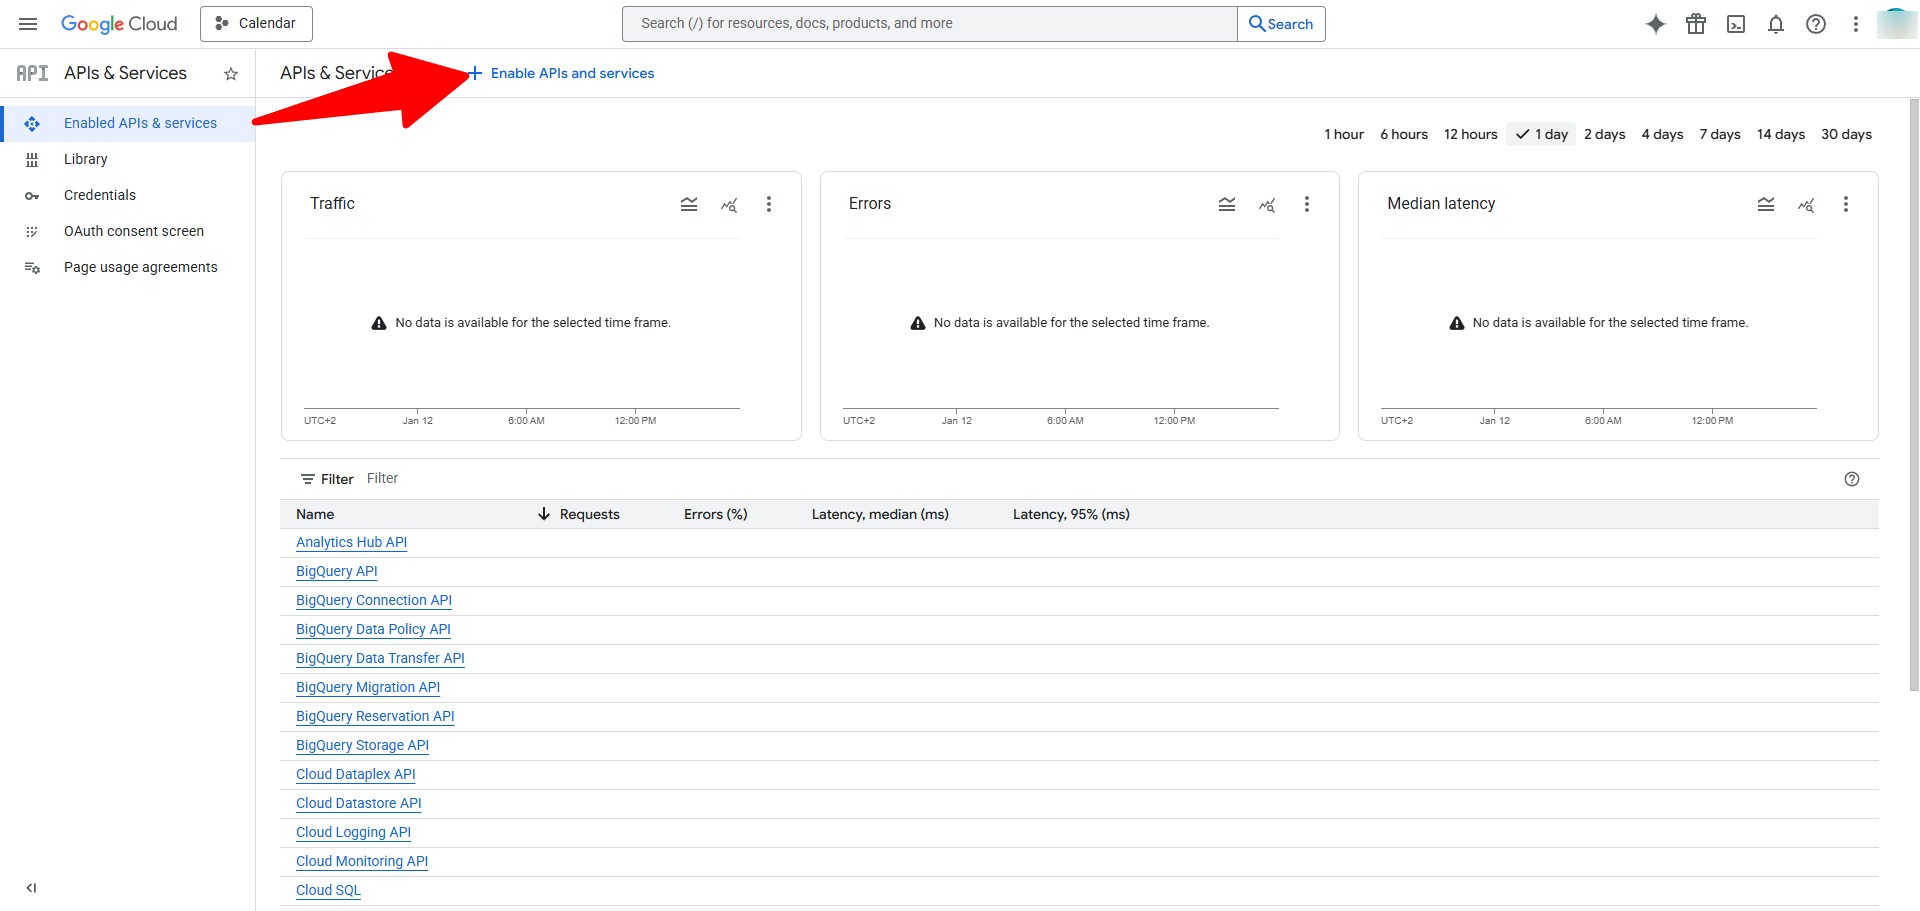
Enable APIs & Services
Navigate to APIs & Services > Enabled APIs & services and click the "+ Enable APIs and services" button at the top.
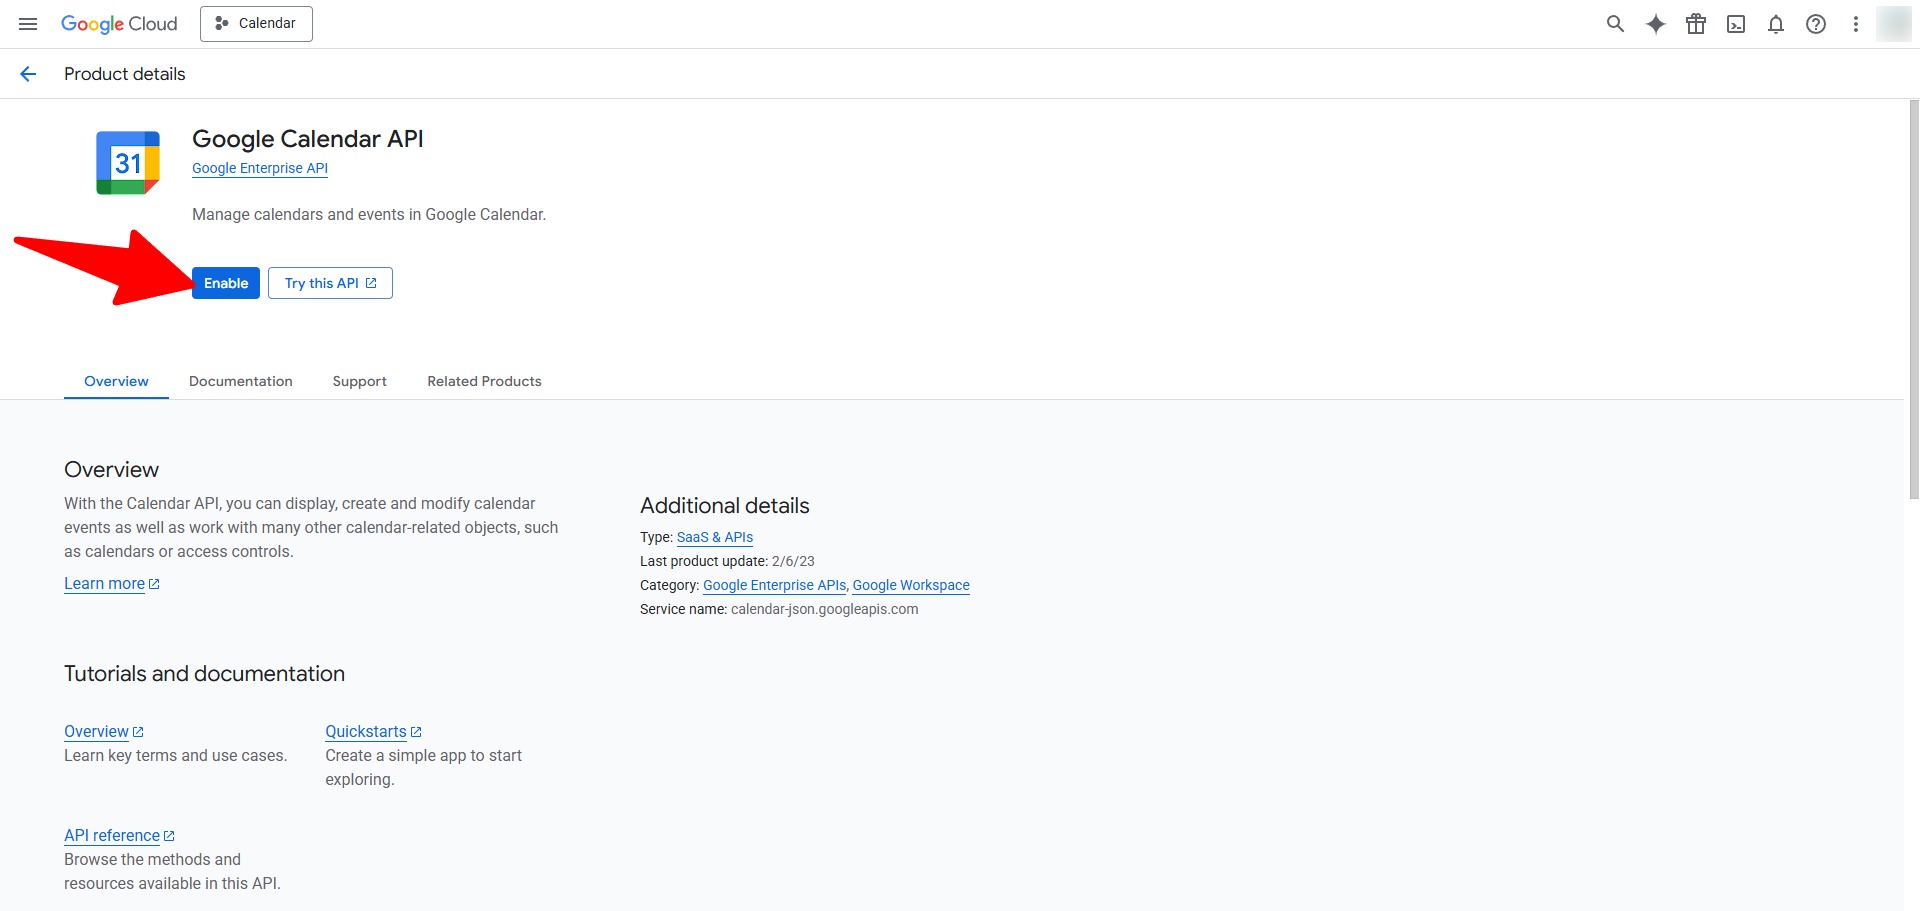
Enable Google Calendar API
Search for "Google Calendar API" and click the Enable button to activate it for your project.
Phase 2: OAuth Configuration
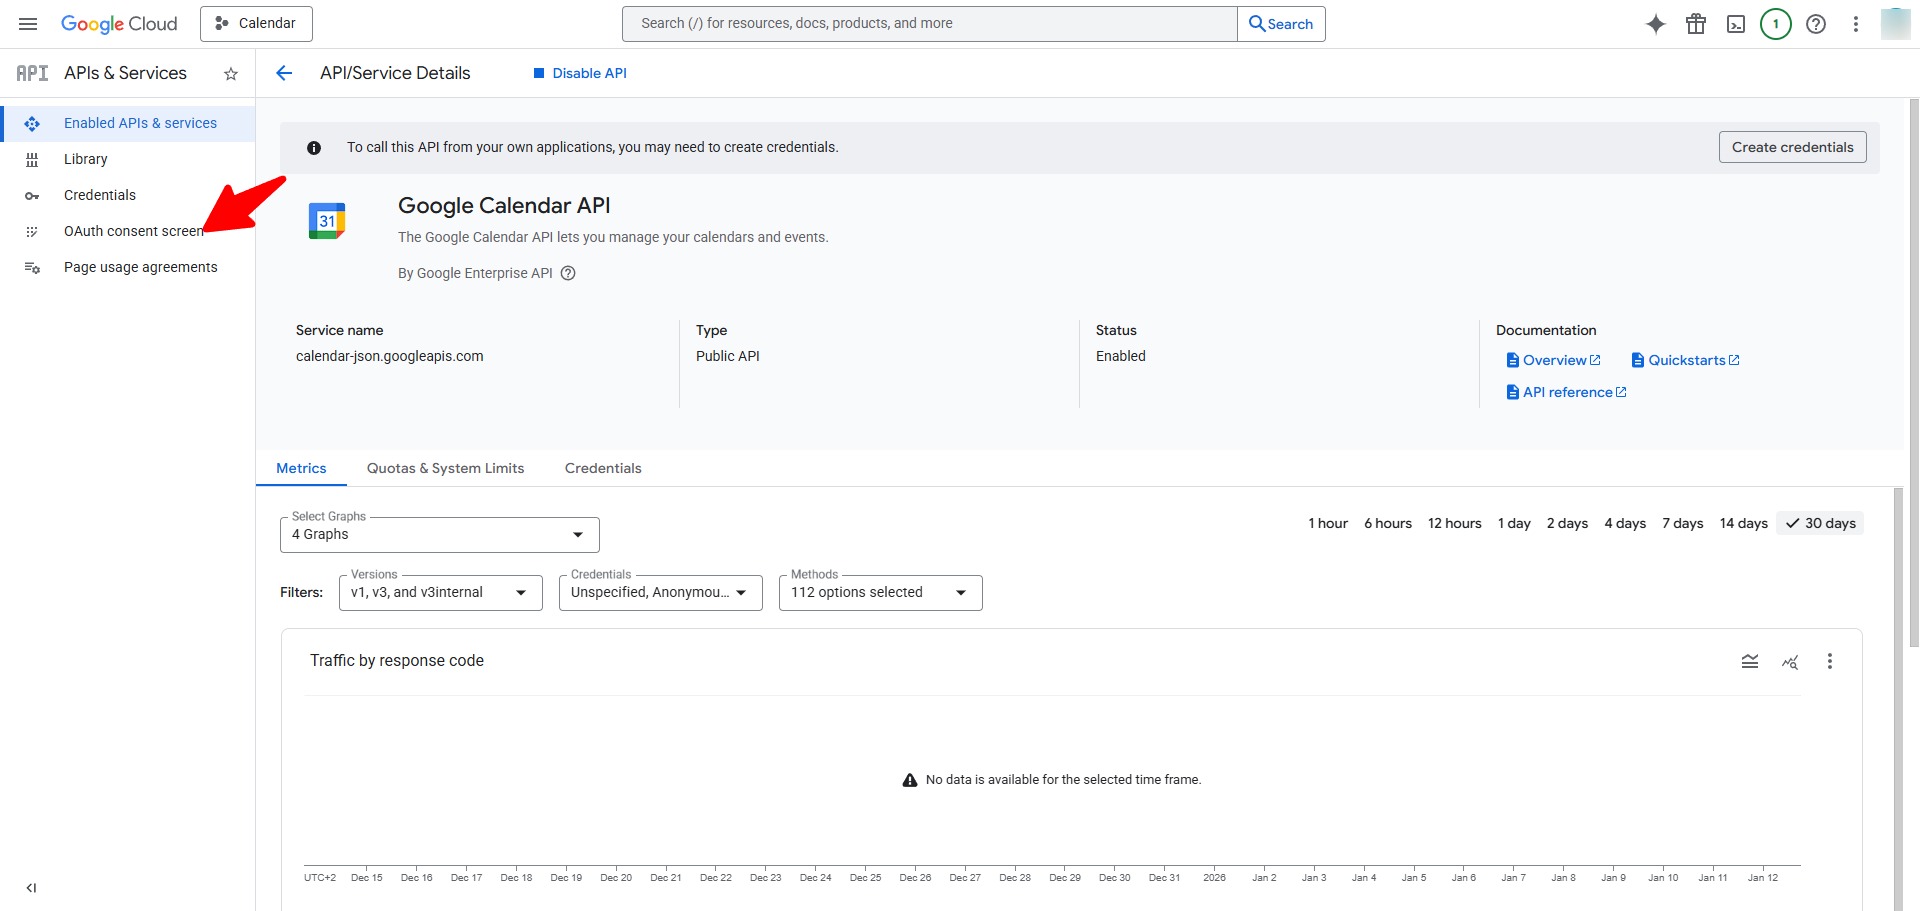
OAuth Consent Screen
In the left sidebar, click on "OAuth consent screen" to begin the configuration.
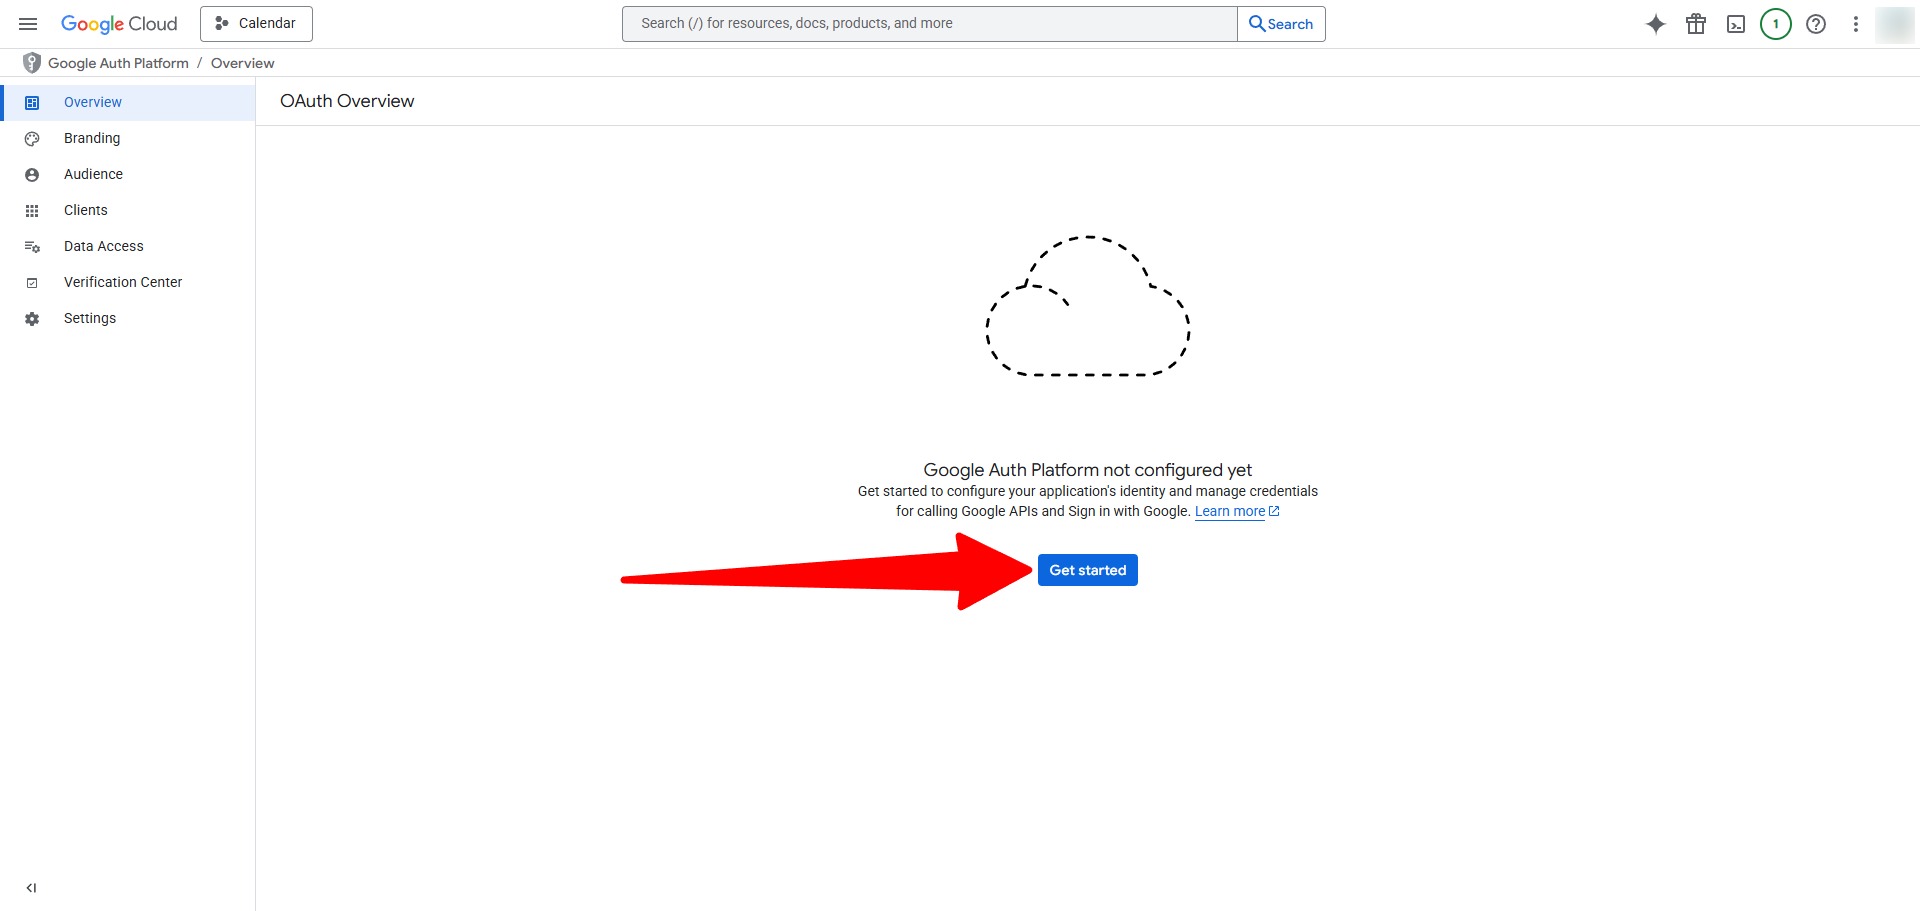
Configure Branding
Click the "Get started" button to set up your application's identity and branding.
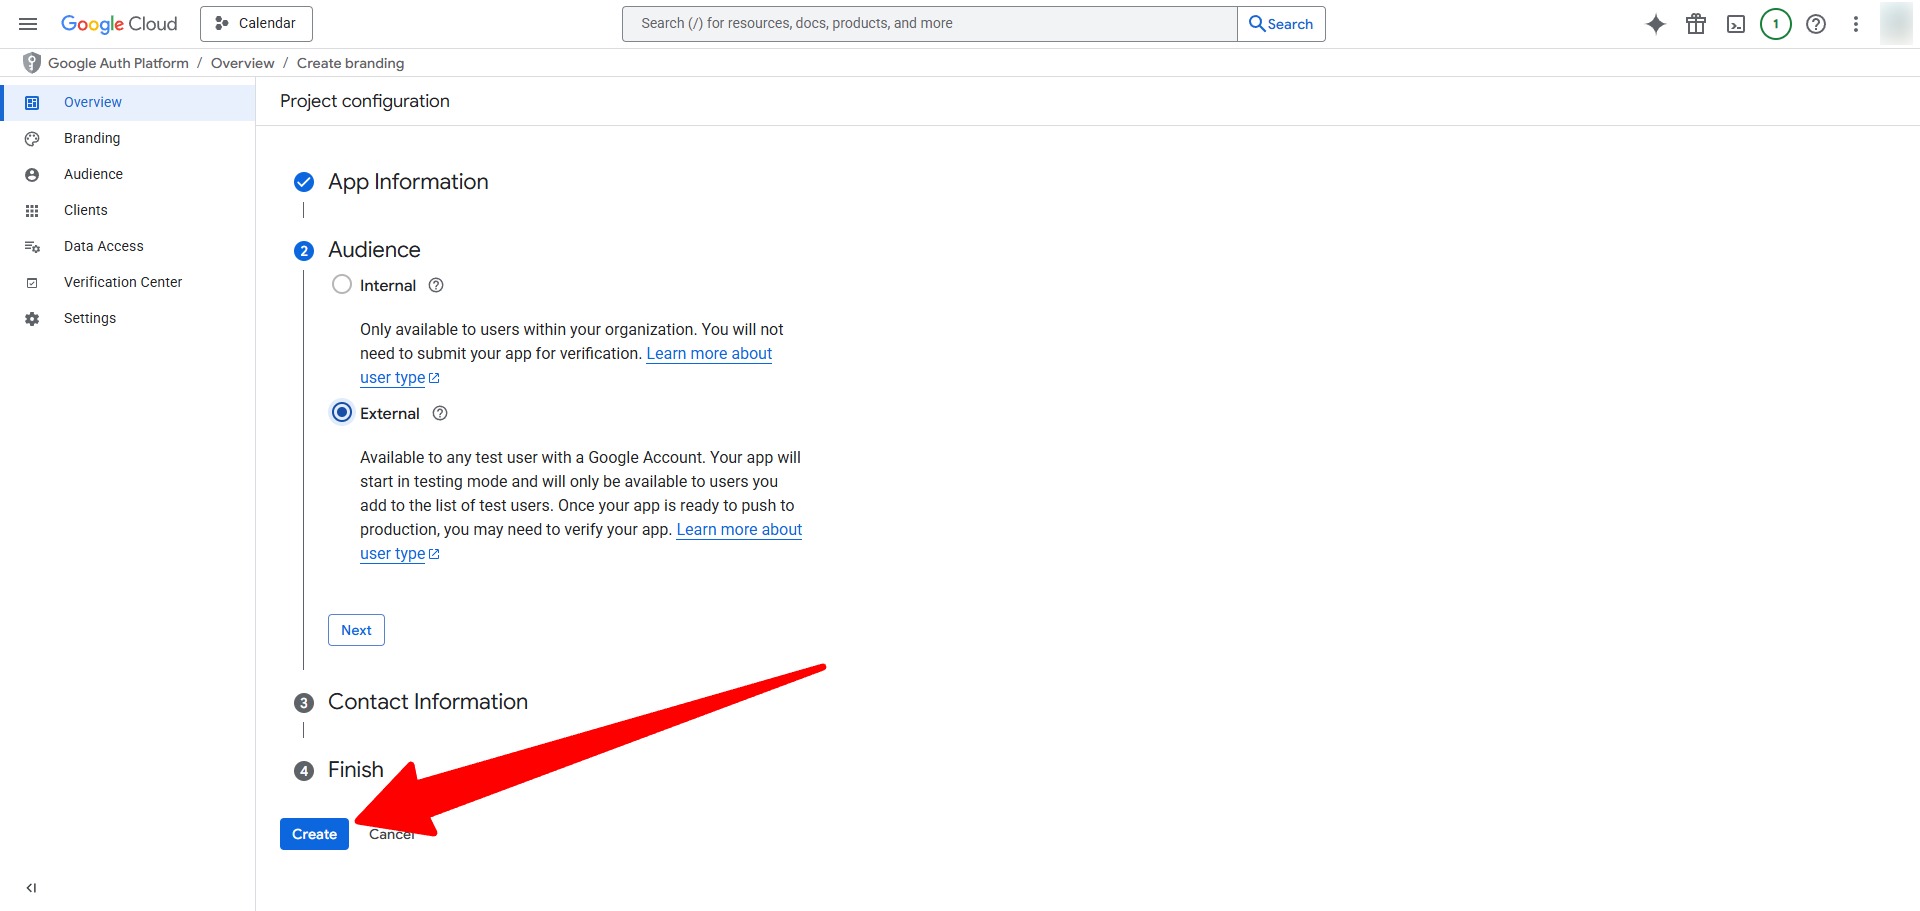
App Information & Audience
Fill in the required information, select "External" user type, and click Create.
Phase 3: Credentials & Keys
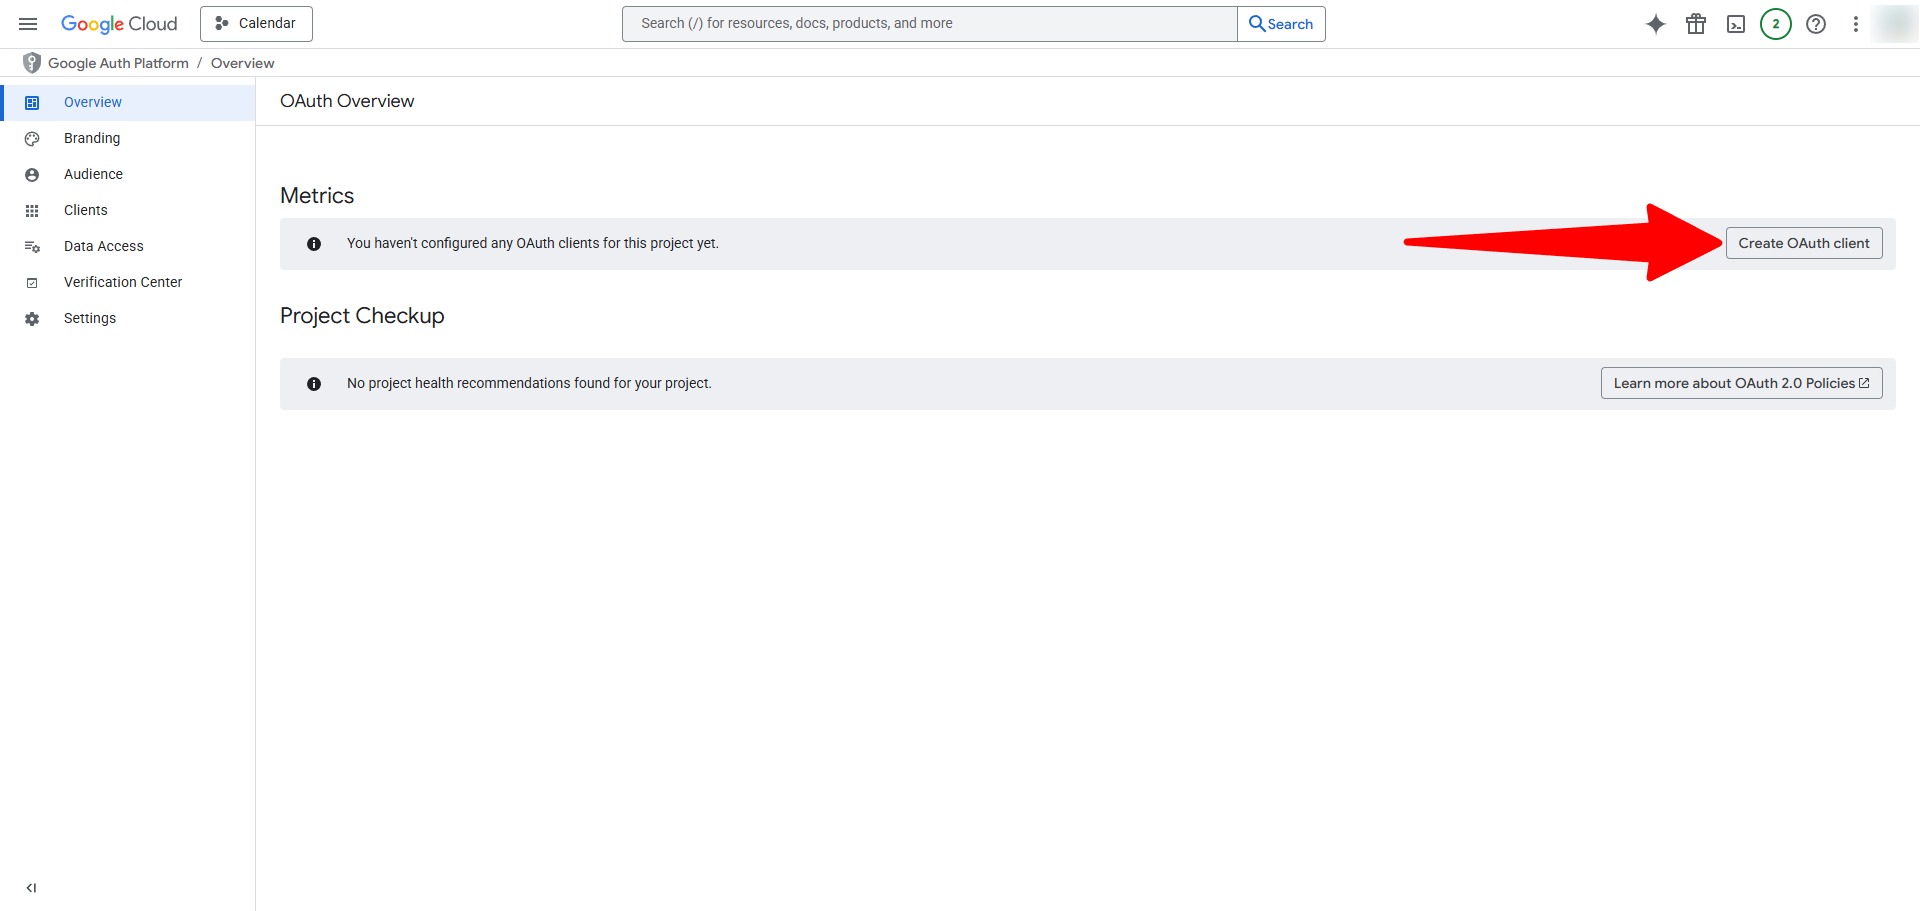
Create OAuth Client
Navigate to the Credentials or Metrics tab and click "Create OAuth client".
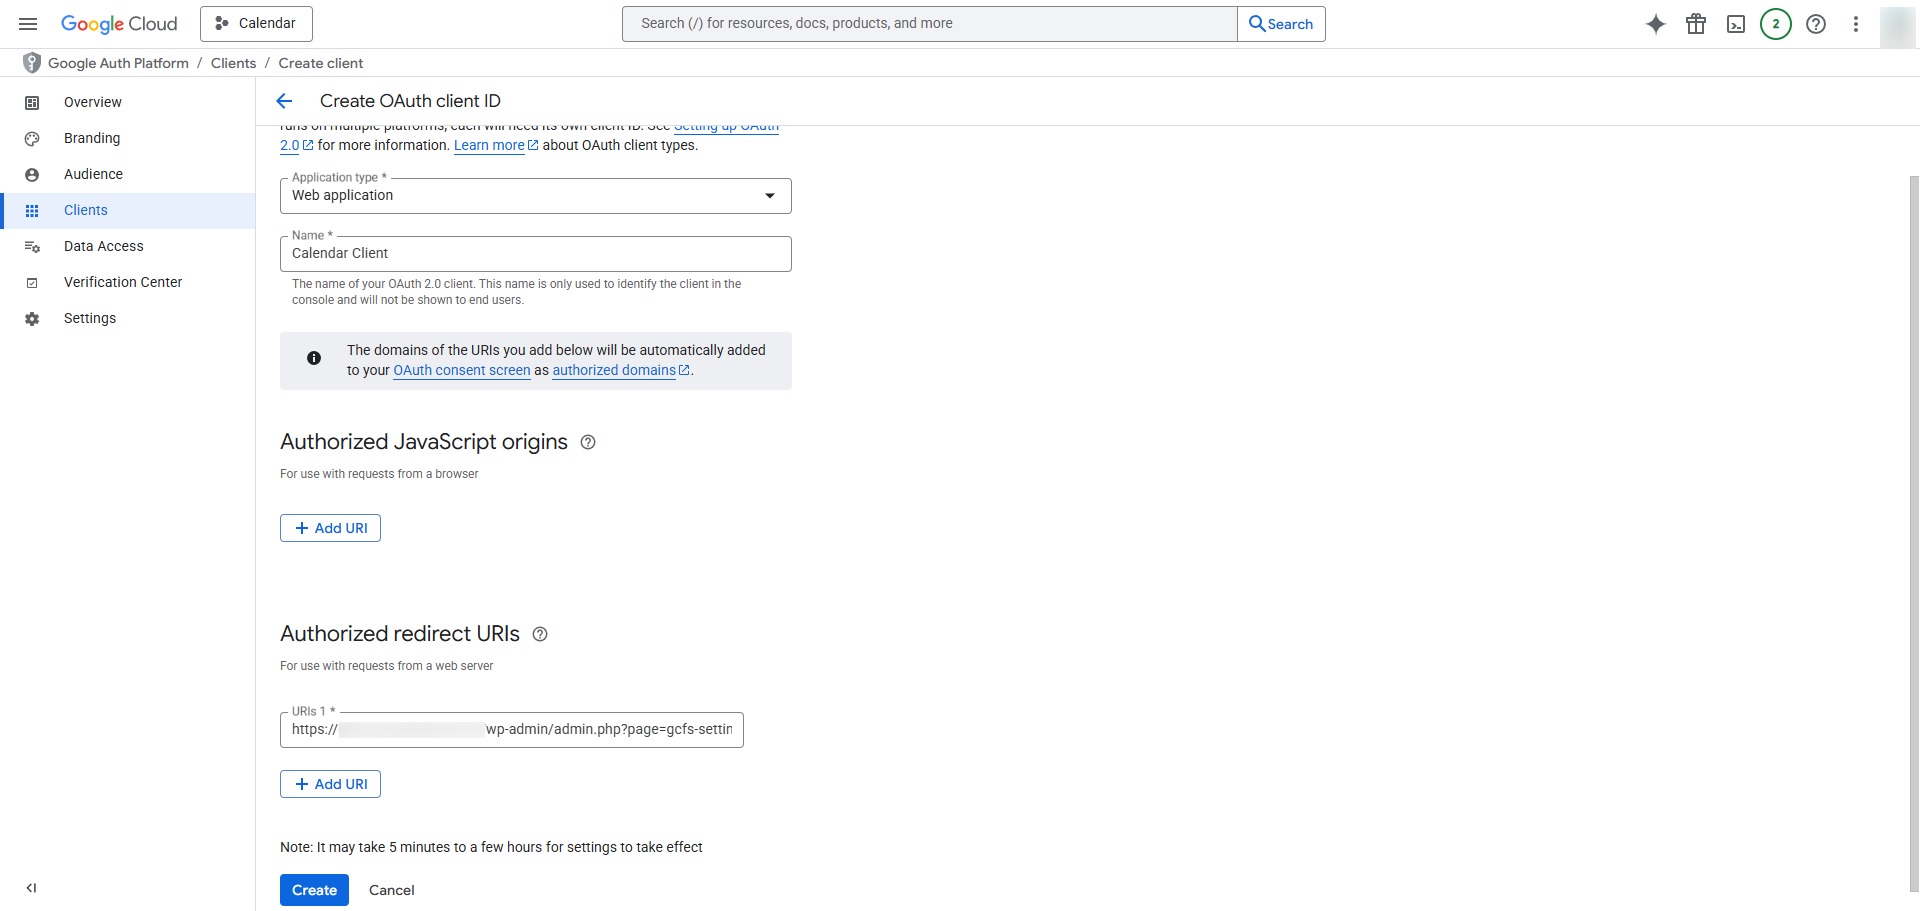
Configure Web Application
Choose "Web application", name it, and most importantly, add your Authorized redirect URIs from the plugin settings.
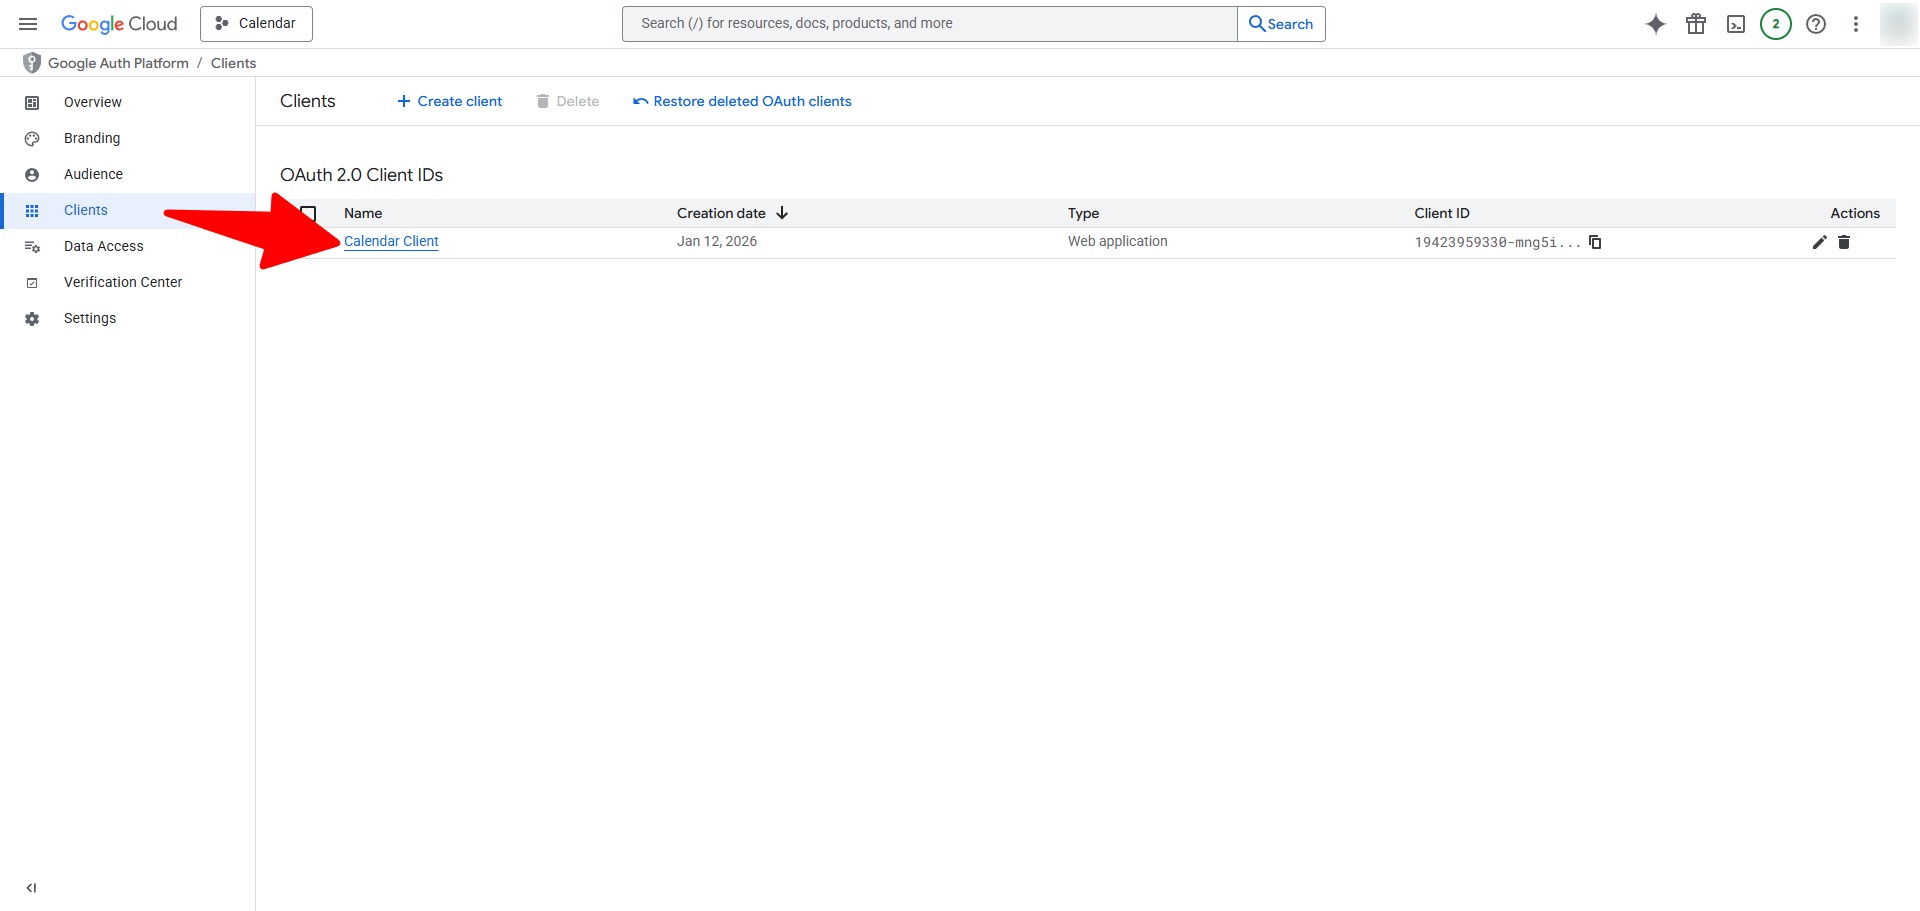
Access Client Details
Find your newly created client in the list and click on its name to view the details.
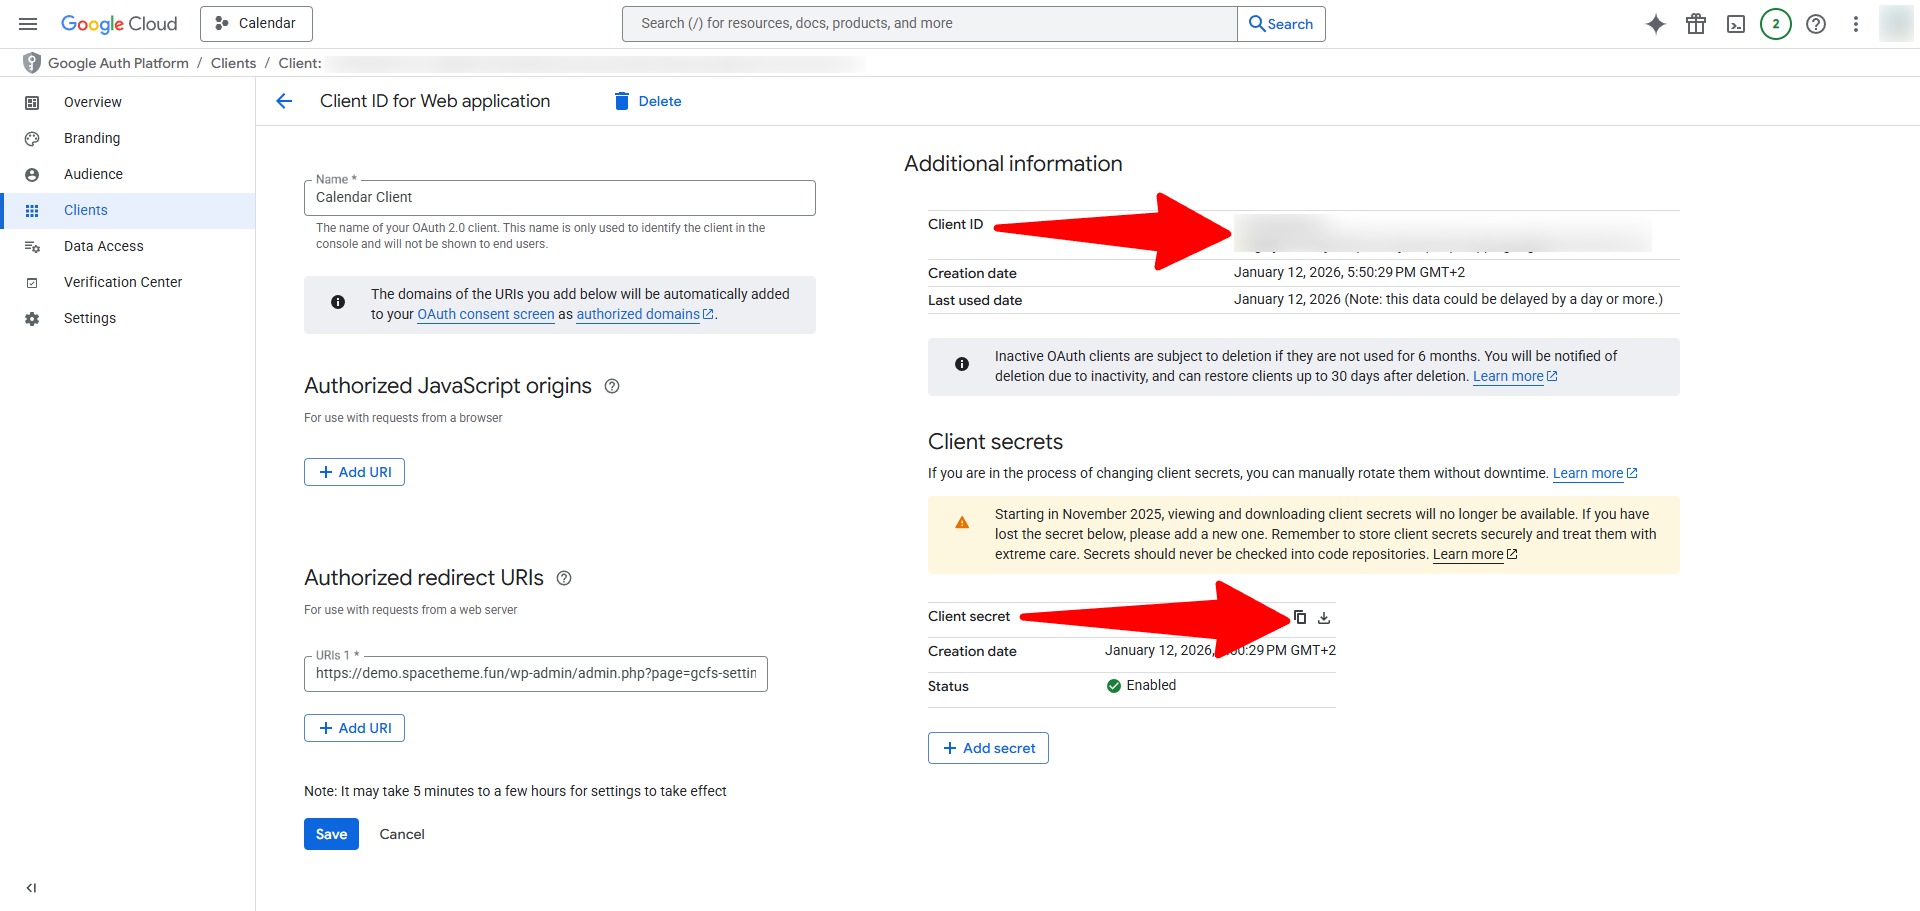
Copy Client ID & Secret
Copy your Client ID and Client secret. You will need these for the plugin settings in WordPress.
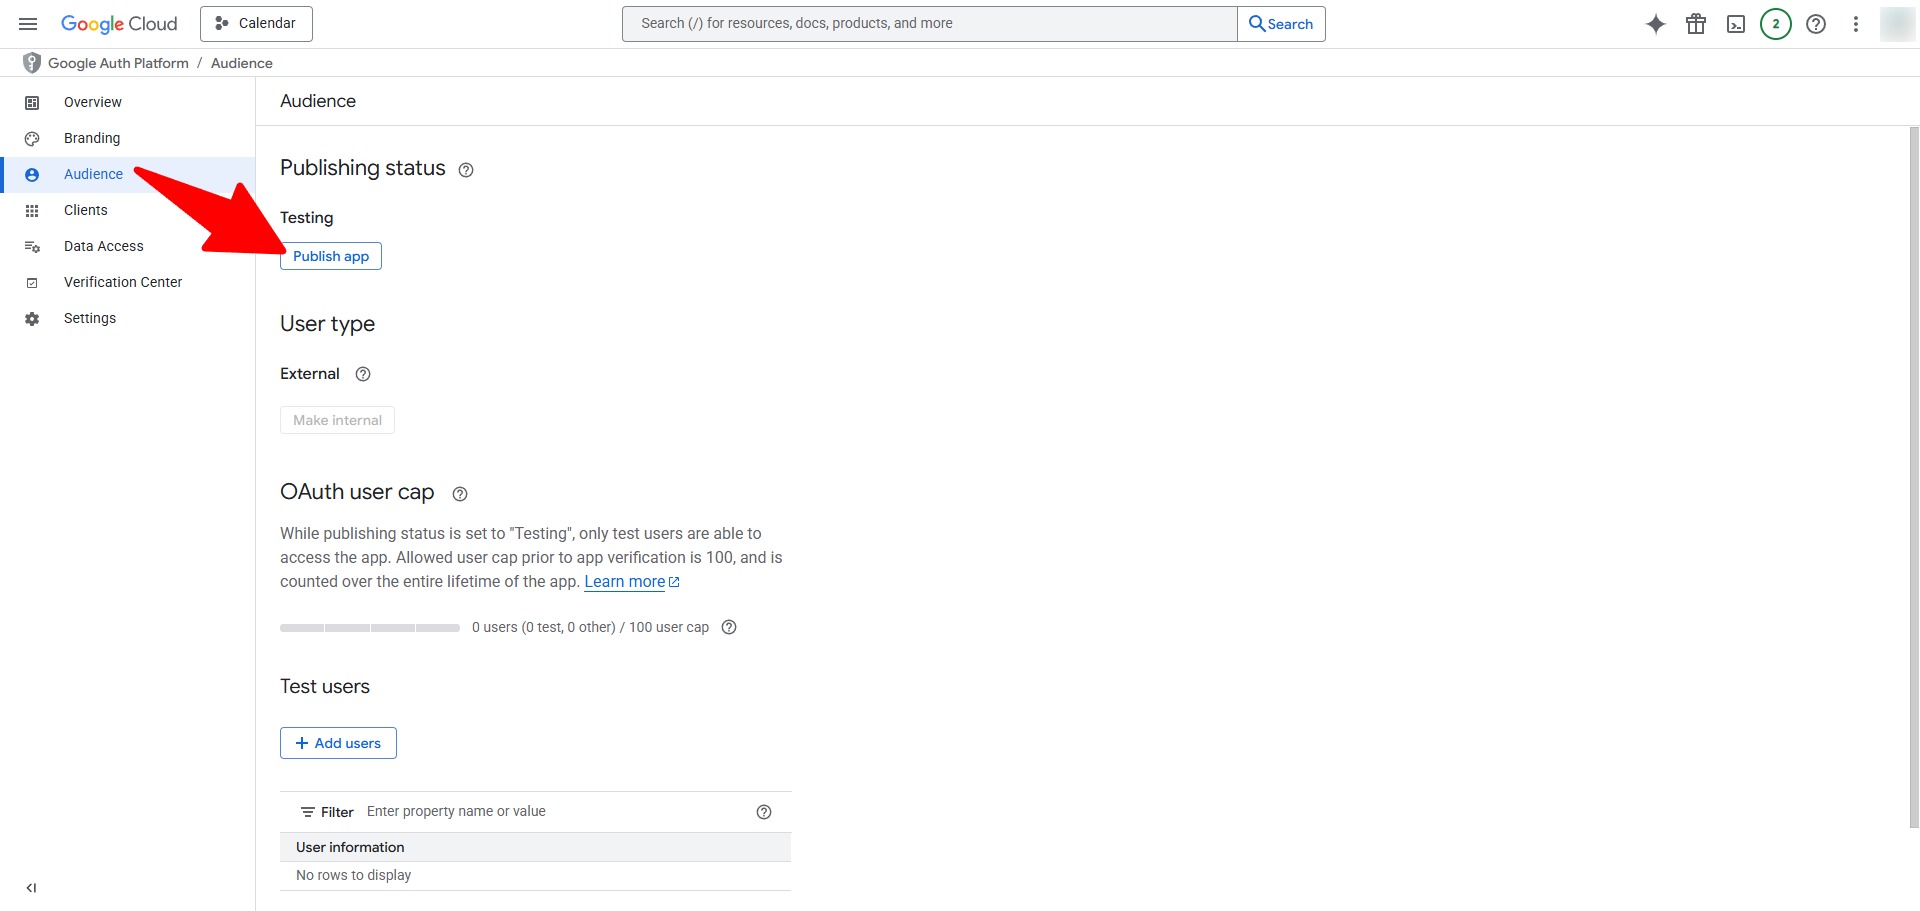
Publish Application
Go back to the "OAuth consent screen" or "Audience" tab and click "Publish app" to make it live.
Phase 4: Calendar Integration
Prepare Your Calendar
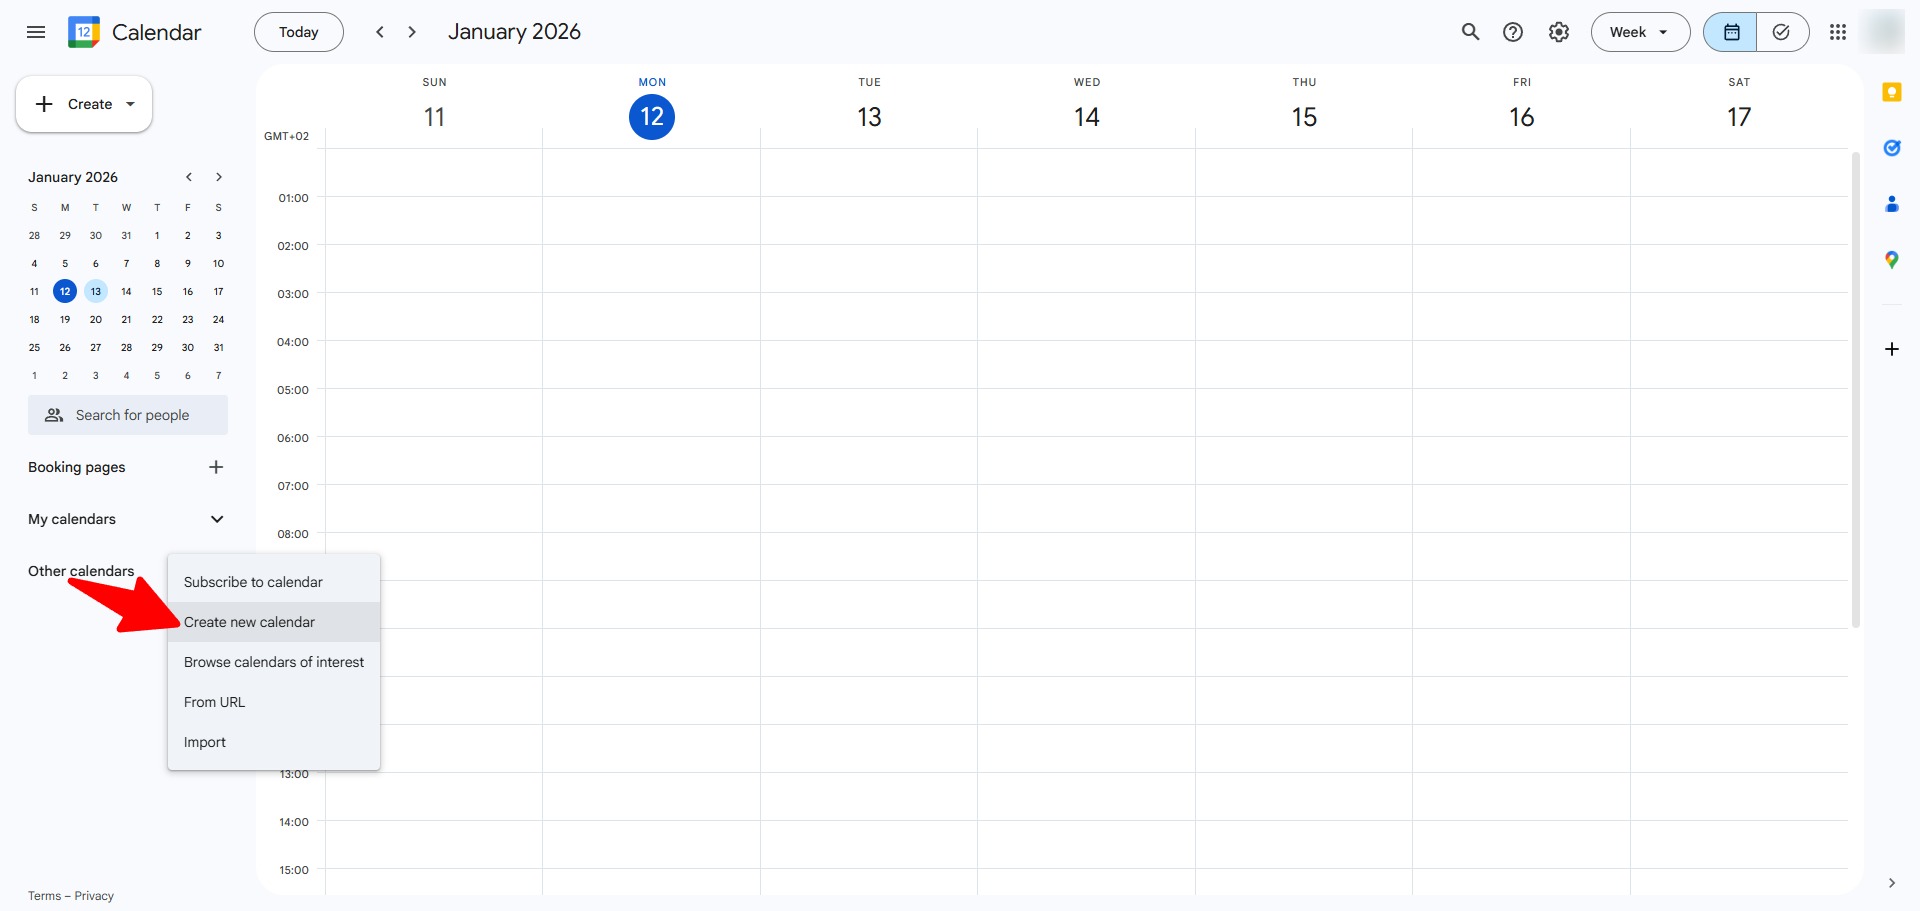
In Google Calendar, click the "+" next to Other calendars and select "Create new calendar".
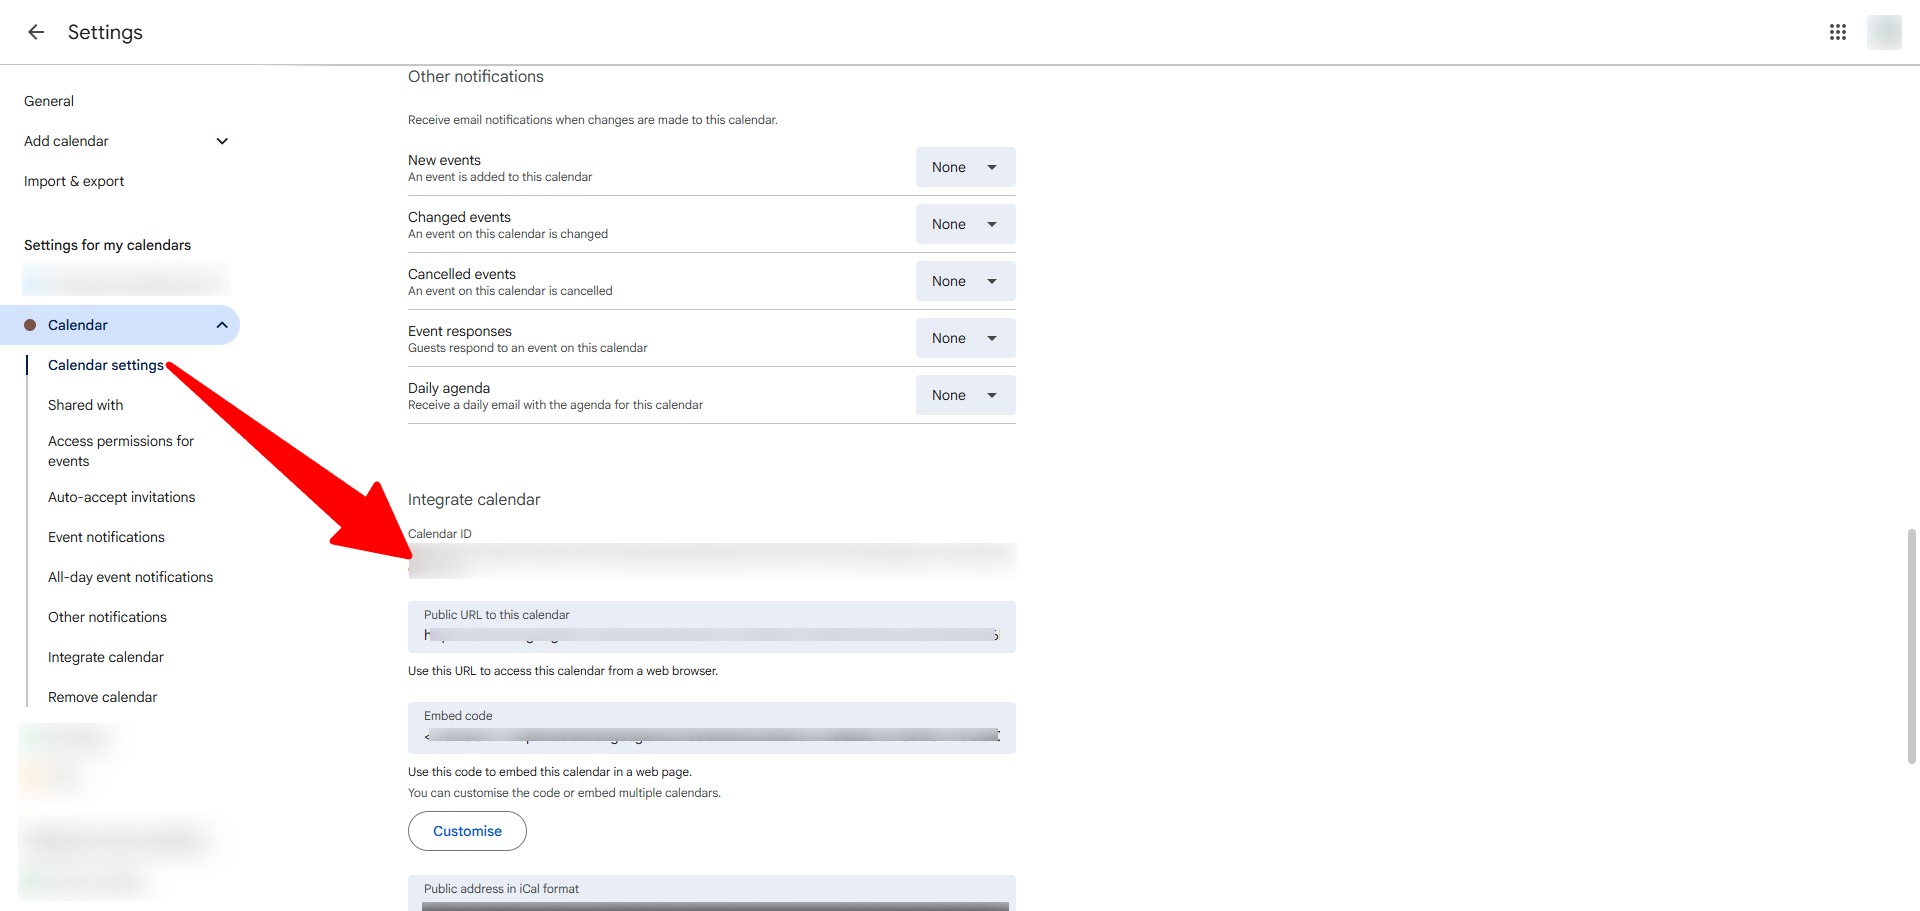
Get Calendar ID
Go to your calendar's settings, scroll to "Integrate calendar", and copy the Calendar ID.
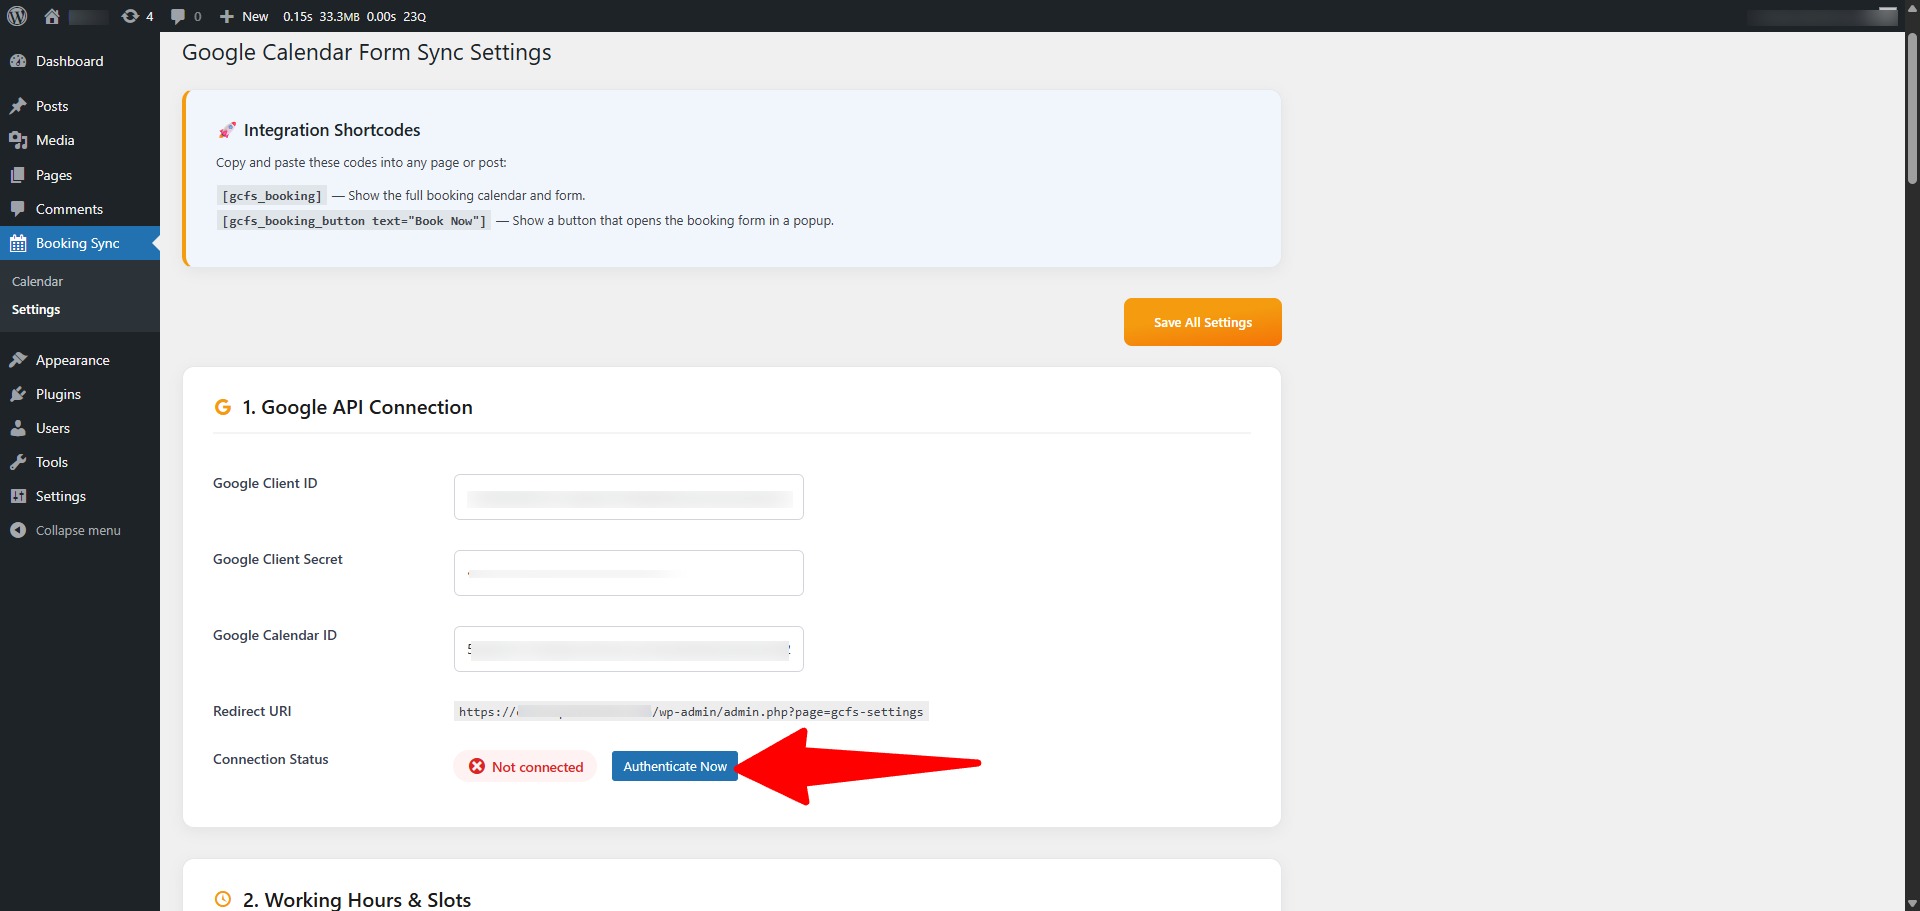
Authenticate in WordPress
Paste your keys and Calendar ID in the plugin settings, save, and click "Authenticate Now".
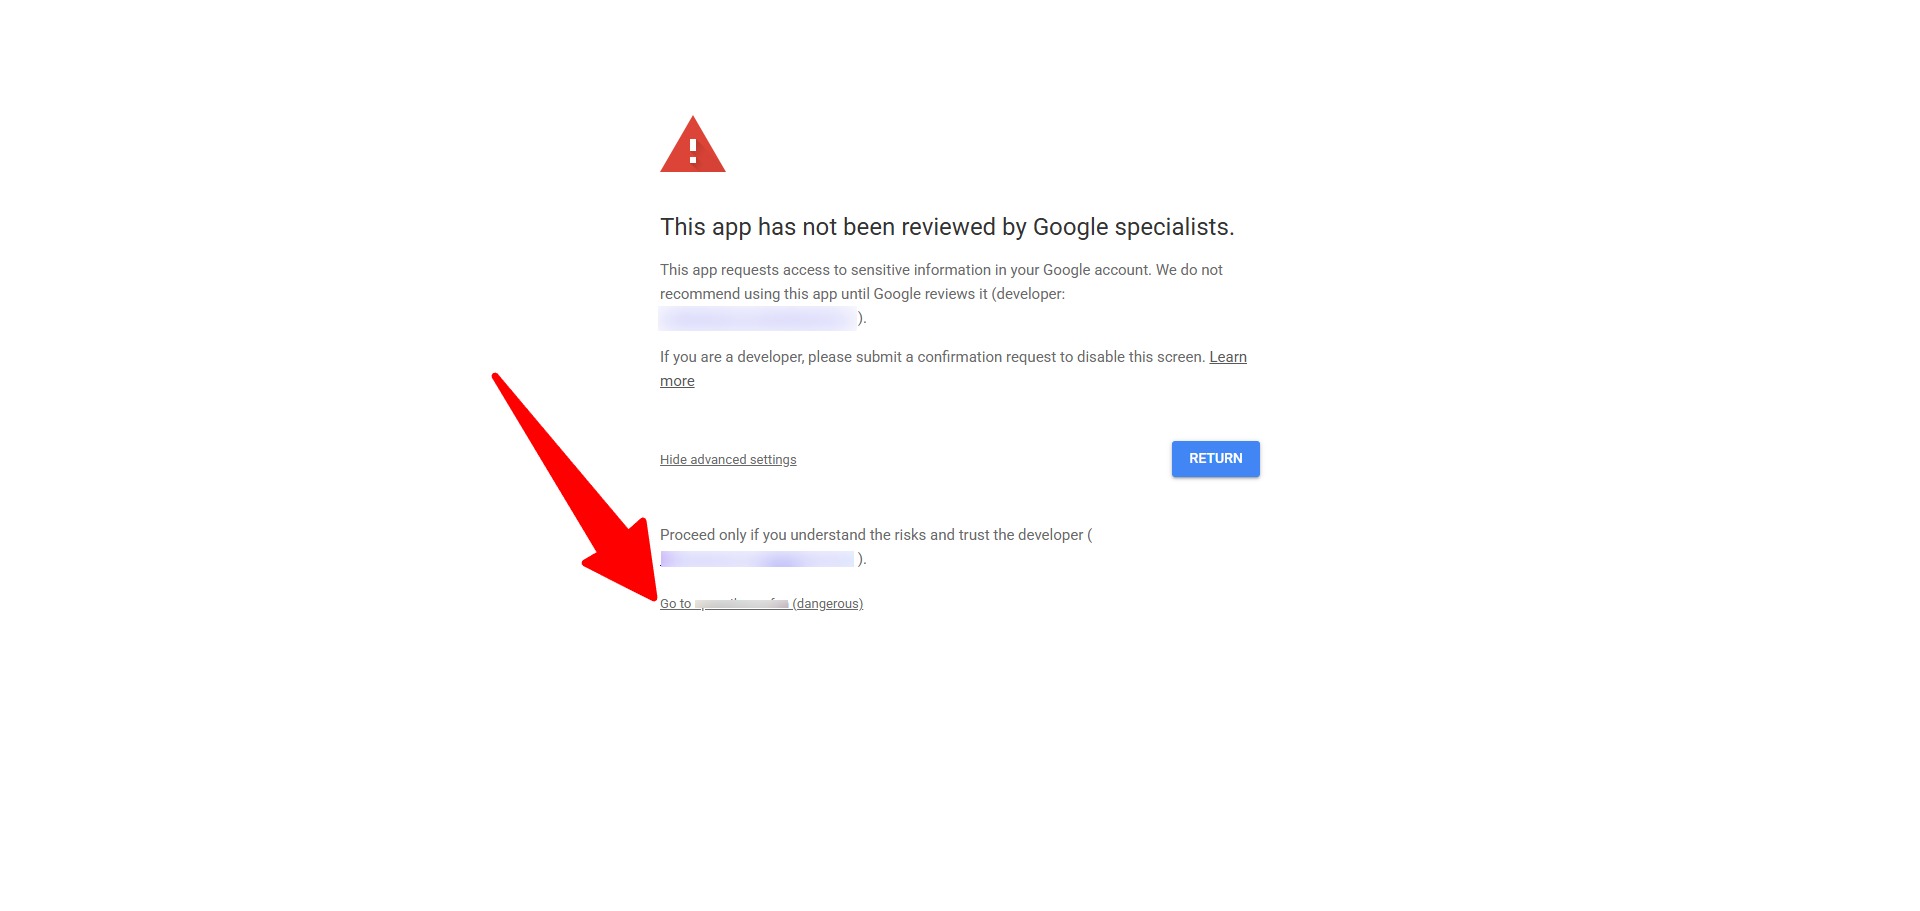
Bypass Security Warning
If you see a warning screen, click "Advanced" and then click "Go to [App Name] (unsafe)".
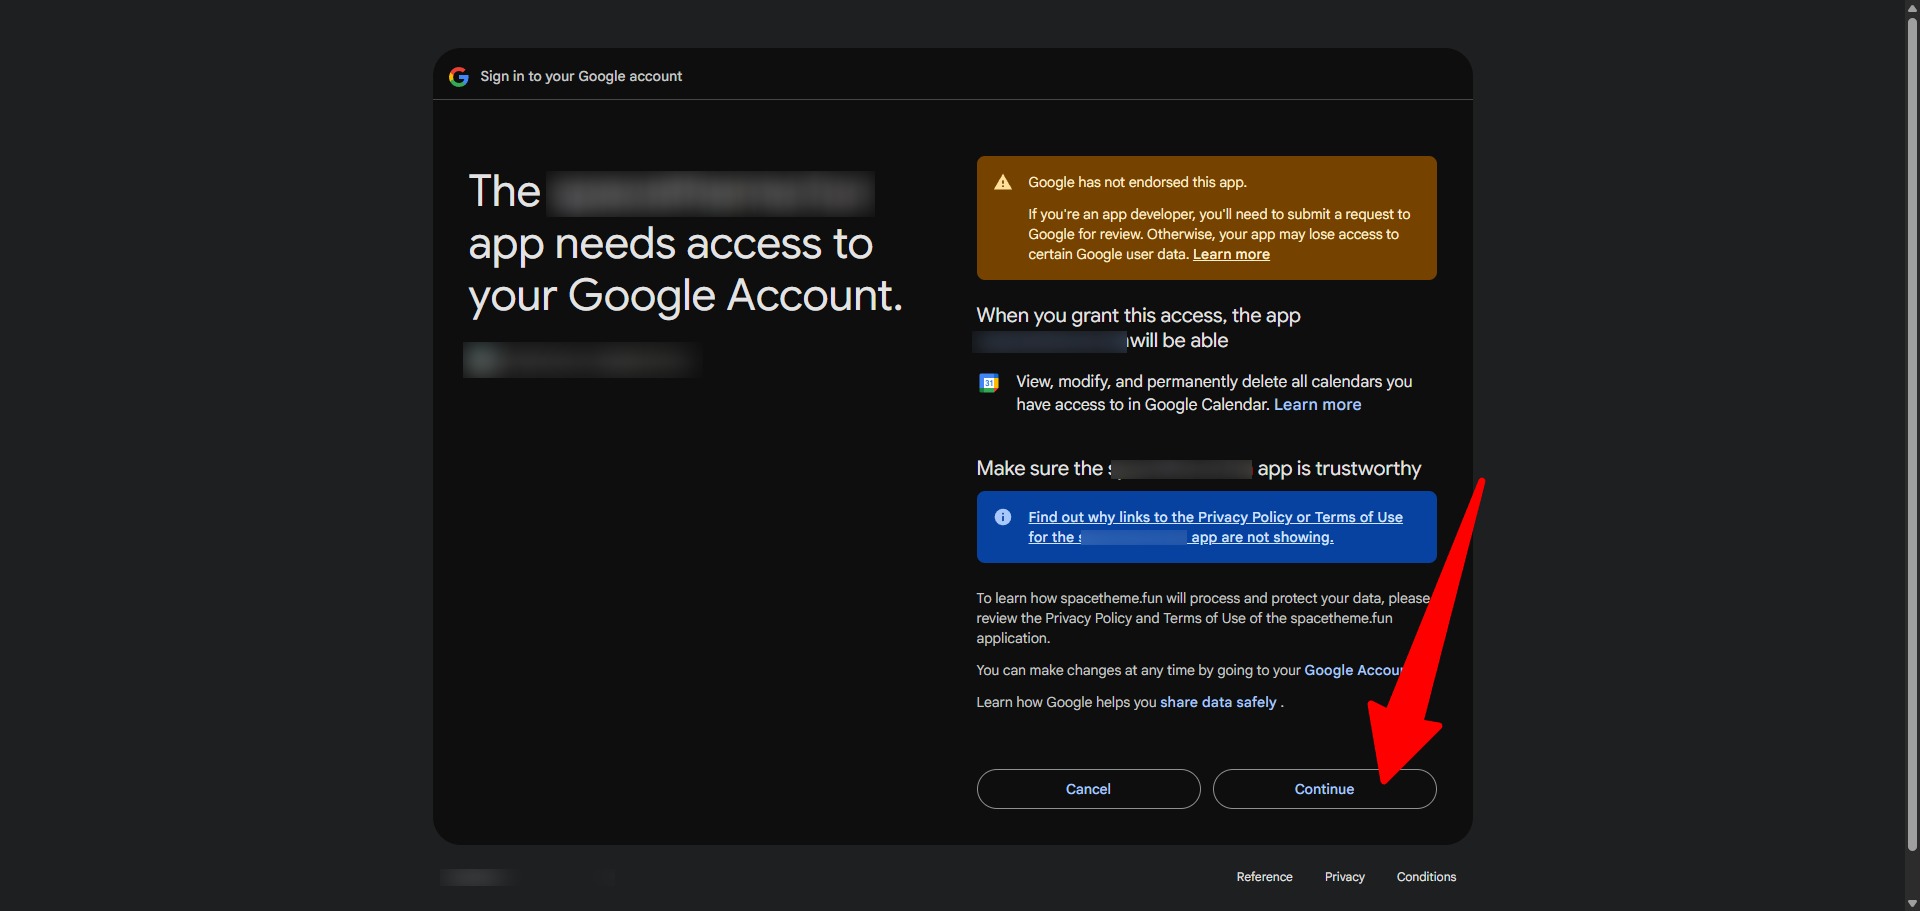
Final Permission
Click "Continue" (or "Allow") to grant the plugin access to your calendar.
Connected Status
Success! You should now see the "Connected" status badge in your admin panel.
03 Scheduling Configuration
Navigate to the settings sections to define:
- Section 2: Default working hours and slot duration.
- Section 2b: Custom hours for specific dates (Overrides).
- Section 3: Global weekends and holidays.
04 Usage & Shortcodes
Standard Embed:
[gcfs_booking]
Popup Button:
[gcfs_booking_button text="Book Your Slot"]
05 Colors & Customization
Match the booking form to your website's identity in Section 5 (UI Customization).
- Primary Color: Affects buttons, selected dates, and accent elements.
- Texts: Translate or rename every field in Section 7.
06 Support
If you encounter issues during setup:
For direct support, contact us via the CodeCanyon support tab.